A jewelry clasp is small, but it carries the security of an entire piece. When a necklace catches on clothing, the clasp absorbs sudden tension, twisting, and repeated movement. A weak mechanism can release without obvious warning.
Consumer confidence increasingly depends on jewelry quality and durability. The 2024 Plumb Club Jewelry Consumer Research highlights the importance of trust, craftsmanship, and product value in purchasing decisions. World Gold Council reports also show continued consumer attention toward jewelry as a meaningful, long-term purchase. These findings make practical quality checks more important for manufacturers, retailers, and buyers.
So, How to test the strength of a jewelry clasp? A reliable evaluation should combine controlled pulling, repeated opening cycles, sideways loading, and close visual inspection. A calibrated force gauge can record the release force in newtons. Inspectors should also examine the spring, hinge, soldered joints, and locking tongue under magnification.
Small details matter.
Professional laboratories should follow documented procedures and use equipment calibrated under ISO/IEC 17025 principles. However, no single universal strength value applies to every clasp. A lightweight earring closure needs a different benchmark from a heavy gold bracelet. That distinction is often overlooked.
This guide explains practical clasp-testing methods, suitable equipment, warning signs, and recording practices. It also compares laboratory testing with realistic wear simulations, such as snagging fabric or applying repeated hand pressure. Results may vary. That is precisely why testing should be repeatable, measured, and honestly documented.
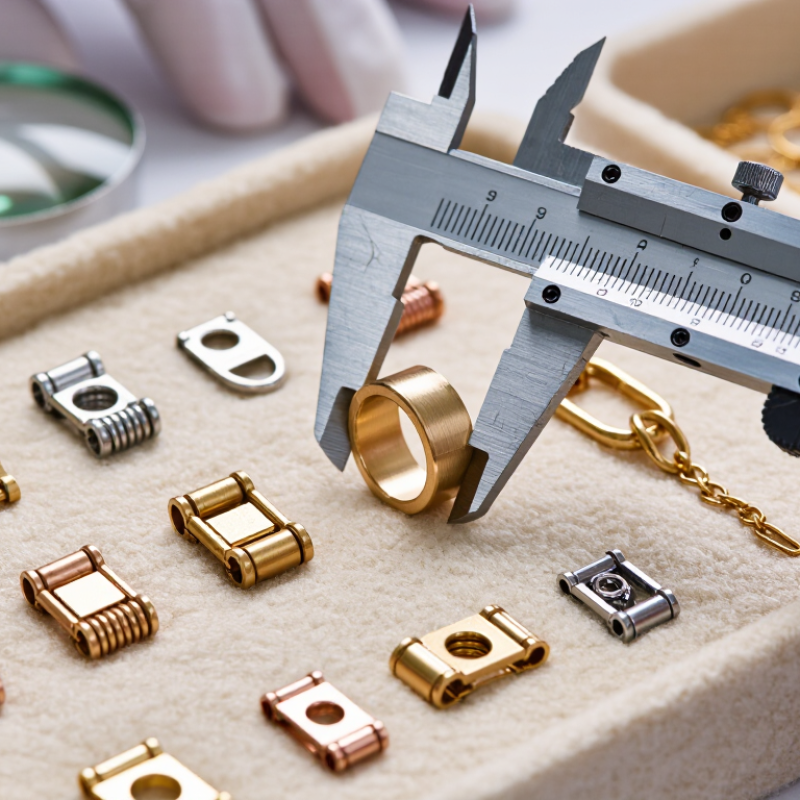
Before testing a jewelry clasp, identify its design and moving parts. Each type fails differently.
A lobster clasp usually depends on a small internal spring. Check whether the lever returns sharply after release. Weak movement may signal fatigue, dirt, or a bent component. A spring-ring clasp has a similar mechanism, but its thin ring can deform. Inspect the opening for a visible gap. Box clasps use a tongue that slides into a fitted housing. Their common failure point is a worn tongue or loose safety latch. Toggle clasps rely on the bar staying across the ring. The ring may stretch under repeated pulling. Magnetic clasps can separate when alignment is poor. Magnets also lose practical grip when debris covers their faces. Tiny parts matter.
Test gently, not violently. Close the clasp and pull the jewelry with steady pressure from both sides. Watch the clasp, not only the chain or bracelet. The closure should remain fully seated without clicking open. Repeat the movement several times. Then examine it under bright light for gaps, scratches, or metal distortion. I once trusted a clasp because it felt firm during one pull. That assumption was wrong. Repeated movement exposed a loose hinge. Avoid using excessive force, especially with delicate metals or older pieces. A clasp can pass a quick hand test and still need professional inspection when the spring feels uneven, the tongue slips, or the safety catches inconsistently.
Identify the clasp type first, then inspect and test its most common failure points. The chart summarizes practical inspection priorities for widely used clasp designs; it is a screening guide, not a substitute for laboratory certification.
Testing tip: Apply a slow, steadily increasing pull along the jewelry’s normal load direction. Stop if the clasp opens, deforms, slips, or shows permanent damage. Repeat the test after cycling the clasp several times and inspect springs, hinges, soldered joints, magnets, and alignment.
A strong clasp starts with a careful visual inspection. Use a 10x loupe, if available, and examine the hinge, spring, solder joints, and closing gate. Look for thinning metal, deep scratches, cracks, or dark gaps around the attachment points. These details often appear before complete failure. The clasp should close without force, then sit flush with the necklace or bracelet. Misalignment matters. A gate that rests slightly open can catch on fabric and release unexpectedly.
Check movement with clean, dry fingers. Open and close the mechanism several times. The spring should return the gate quickly, without hesitation or a loose, rattling feel. Gently pull the jewelry from both sides for a few seconds. Do not yank it. A box clasp should produce a clear, firm engagement, while a lobster clasp should resist light tension without reopening. The 2024 National Retail Federation returns report estimated that 16.9% of retail sales were returned, though this figure covers all retail categories, not jewelry clasps specifically. It still shows why small construction faults deserve attention. My own inspection habit is imperfect; lighting can hide hairline cracks, and a clasp may pass today but weaken tomorrow. ASTM F2999 guidance on adult jewelry safety also supports checking component security and hazardous edges during quality control. Capture close photographs before and after testing. That record can reveal gradual wear.
A jewelry clasp should open smoothly and close with a clear, secure feel. Hold the jewelry over a soft, clean cloth during testing. This prevents scratches if the piece slips. Use your thumb and forefinger to open the clasp without forcing it. Notice any grinding, stiffness, or sudden release. A reliable clasp usually moves evenly and gives slight resistance.
Close it slowly. Listen for a faint click, if the design produces one. Then tug the chain or bracelet gently in opposite directions. Do not pull hard. Repeat this movement three or four times. The clasp should remain shut, while the hinge or spring should not wobble. In my experience, a clasp that feels secure once may still loosen after repeated handling. That small detail is easy to overlook.
Tips
Test the clasp with dry hands and good lighting. Check the connecting ring, hinge, and latch separately. Never use pliers for a basic hand test. They can bend delicate parts and hide the original problem. If the clasp opens during a gentle tug, stop wearing the jewelry until a qualified jeweler examines it. Some clasps make no audible click, so silence alone does not prove weakness. My own testing can miss tiny internal wear, especially in compact mechanisms. A professional inspection remains the safer choice for valuable or frequently worn pieces.
| No. | Test Method | How to Perform the Test | What to Check | Suggested Pass Criteria | Recommended Frequency | Result |
|---|---|---|---|---|---|---|
| 1 | Gentle Hand Opening and Closing Test | Open and close the clasp slowly by hand for 5 to 10 cycles. Do not twist the jewelry or force the mechanism beyond its normal range. | Check whether the clasp opens smoothly, closes completely, and produces a clear engagement or locking feel. | Pass The clasp operates consistently without sticking, excessive looseness, or accidental release during light handling. |
Before wearing and after extended storage | Record as Pass, Needs Adjustment, or Replace |
| 2 | Visual Alignment Inspection | Place the jewelry under bright, even lighting and inspect the clasp, hinge, tongue, hook, connector rings, and soldered joints. | Look for gaps, bent parts, cracked metal, sharp edges, corrosion, worn plating, or a misaligned locking component. | Pass No visible damage or separation is present, and the moving parts align correctly when closed. |
Every time the item is cleaned or handled | Document any defect with a close-up photograph |
| 3 | Light Retention Check | Close the clasp and hold the jewelry above a clean, soft surface. Apply a light, steady pull in opposite directions for approximately 3 to 5 seconds. | Observe whether the clasp remains fully engaged without opening, slipping, or visibly deforming. | Pass The clasp stays closed under gentle hand tension. Stop immediately if movement or deformation is detected. |
After an impact, snag, or accidental drop | Do not use a heavy load as a home test |
| 4 | Hinge and Spring-Action Test | Operate the clasp slowly while watching the hinge or spring section. Compare the opening and closing action across several cycles. | Check for unusual resistance, rattling, delayed return, weak spring action, or movement that feels different from the previous inspection. | Pass Movement is controlled and repeatable, with no grinding noise or visible hinge distortion. |
Monthly for frequently worn jewelry | Professional servicing may be needed for loose hinges |
| 5 | Connector and End-Ring Check | Inspect the rings or loops connecting the clasp to the chain, bracelet, or cord. Gently move each connection from side to side without pulling sharply. | Look for an opening in a jump ring, thinning metal, incomplete soldering, or a connector that rotates excessively. | Pass Connector rings are closed, secure, and free from visible cracks or excessive wear. |
Every 2 to 4 weeks for daily-worn pieces | Repair before wear if a ring is visibly open |
| 6 | Wear Simulation Test | Fasten the jewelry and move it gently through normal activities such as turning the wrist, bending the neck, or changing clothing. Avoid snagging it intentionally. | Check whether clothing, skin, or hair can catch the clasp and whether ordinary movement causes the closure to shift. | Pass The clasp remains closed during normal movement and does not create a sharp or irritating contact point. |
After a clasp repair or design change | Stop use if the clasp catches repeatedly |
| 7 | Cleaning and Residue Check | Clean the clasp according to the jewelry material’s care requirements, then inspect and operate it again after it is completely dry. | Check for lint, soap residue, skin oils, or debris that could prevent the locking components from seating fully. | Pass The clasp closes fully after cleaning and no residue interferes with the locking action. |
After exposure to cosmetics, lotion, sweat, or water | Avoid forcing debris into the mechanism |
| 8 | Professional Load Verification | For valuable, heavy, or frequently worn pieces, request controlled testing by a qualified jeweler using equipment appropriate for the clasp and jewelry construction. | Assess retention strength, component wear, soldered joints, and whether the clasp is suitable for the jewelry’s weight and intended use. | Pass The clasp meets the professional’s recommended safety level for the specific piece. |
Annually or after significant damage | Recommended for high-value or heavy jewelry |
Safety note: A hand test is intended to identify obvious problems, not to measure the exact breaking strength of a clasp. Do not use weights, sudden jerks, or sharp pulling, as these actions can damage the jewelry or cause injury.
A clasp should be tested with controlled pressure, not a sudden yank.
Close the clasp fully and attach soft fabric loops to both sides. Pull slowly with your hands or a small force gauge. Increase the pressure every two or three seconds. Stop when the clasp shifts, opens, bends, or makes a sharp clicking sound. Do not test until failure.
A spring-ring, lobster, box, or magnetic clasp needs a different inspection.
Watch the spring, hinge, tongue, and soldered joints closely. The jewelry should remain aligned while pressure increases. A practical test uses light resistance first, then moderate resistance that reflects normal wear. Never pull harder just to obtain a dramatic result. I have found that a quick tug can hide a weak hinge and damage a sound chain.
The World Gold Council’s Gold Demand Trends: Full Year and Q4 2023 reported about 2,093 tonnes of global gold jewelry demand. This figure measures market volume, not clasp reliability. Still, it shows why repeatable quality checks matter across large-scale jewelry production. ASTM F2923-14 also demonstrates that safety standards may define product requirements without offering one universal clasp-pull rating. That limitation deserves attention. Record the clasp type, test direction, pressure, and visible changes. Photos help, but my own judgment is not perfectly consistent. Use calibrated equipment for valuable or professionally inspected pieces.
After testing a jewelry clasp, inspect it under bright, neutral light. Look for widened gaps, bent hooks, loose hinges, or fresh scratches around the closure. A clasp can still open normally while its metal is weakening. That detail is easy to miss.
I test the clasp with gentle, steady pressure rather than sudden force. I repeat the opening and closing cycle several times, then check whether the mechanism still clicks firmly. For a lobster-style clasp, I examine the spring return and the small lever. For a box clasp, I check alignment and the fit of its tongue. I also listen for unusual sounds. A faint click may be normal, but grinding or rattling deserves attention.
Record the condition before and after testing. Note the date, test method, number of cycles, and any visible change. A simple photograph beside a ruler can show whether a gap has increased. Write down whether the clasp opened accidentally or needed extra pressure. Small changes matter. I once treated a slightly loose hinge as harmless, but repeated movement made it worse. That experience changed my inspection routine. I now compare the clasp with its original notes instead of trusting memory. If the closure feels unreliable, stop wearing the piece until a qualified jewelry professional examines it.
Identify the clasp design and its moving parts. A lobster-style clasp uses a small internal spring. A box clasp uses a sliding tongue. A toggle clasp depends on a bar crossing a ring. Tiny parts matter.
Close the clasp and pull gently from both sides. Use steady pressure, not a sudden yank. Repeat the movement several times. Watch whether the closure remains fully seated. Violence is unnecessary.
The lever should return quickly after release. Slow movement may indicate dirt, fatigue, or bending. Listen for rattling or grinding sounds. A loose feeling deserves attention. Do not ignore hesitation.
Use clean, dry fingers and a small magnifying loupe. Examine the hinge, spring, gate, and attachment points. Look for cracks, thinning metal, scratches, or dark gaps. A slightly open gate can catch on fabric. That tiny gap matters.
A thin ring may deform after repeated pulling. A box clasp may develop a worn tongue or loose safety catch. A toggle ring may stretch over time. A magnetic closure may separate when poorly aligned. Debris can reduce magnetic grip.
Yes. A single pull may hide a loose hinge or weakening spring. Repeated opening and closing can reveal movement problems. I once trusted a firm feeling clasp too quickly. That judgment was wrong.
Note the date, test method, and number of movement cycles. Record any gap, scratch, bent hook, or loose hinge. Photograph the clasp beside a ruler. Compare new images with earlier records. Memory is unreliable.
Stop wearing it if the clasp opens unexpectedly or needs extra pressure. Also stop if the safety catch works inconsistently. A widening gap may signal weakening metal. A qualified jewelry professional can inspect delicate components safely. Do not keep testing forever.
How to test the strength of a jewelry clasp begins with identifying its design, such as a lobster clasp, spring ring, box clasp, or magnetic closure. Each type has different weak points, including worn springs, loose hinges, misaligned parts, or a latch that does not fully engage. Examine the clasp closely for scratches, bending, gaps, corrosion, or unusual movement. Make sure the closure lines up correctly and clicks or locks securely without forcing it.
Next, open and close the clasp several times by hand to check whether it operates smoothly and remains firmly shut. Apply gradual pulling pressure while holding the jewelry near the clasp, stopping immediately if the piece bends, stretches, or shows stress. Avoid sudden tugs that could damage delicate links or stones. After testing, inspect the clasp and nearby connections again for new gaps or movement, and record any changes so repairs or professional evaluation can be arranged before regular wear.
