2026 Top Tips for Polishing Dull Gemstones?

Time:2026-09-22 Author:Sienna
0%

Dull gemstones often need more than a quick wipe with a soft cloth. Cloudy surfaces may result from body oils, fine scratches, residue, or an unsuitable setting. In 2026, careful polishing begins with identification, not guesswork. Each gemstone has different hardness, cleavage, porosity, and heat sensitivity. A method that revives quartz may damage opal, emerald, or turquoise. That difference matters.

So, what is the best way to polish dull gemstones? Start by examining the stone under bright, neutral light. Look for loose settings, visible fractures, worn coatings, and dirt near the edges. Wash the gem with lukewarm water, mild soap, and a soft brush. Dry it completely before judging its shine. Sometimes, cleaning solves the problem. Sometimes, it exposes deeper scratches.

For lightly marked durable stones, a professional lapidary may use graded diamond abrasives, controlled pressure, and fresh polishing compounds. The abrasive must match the gemstone’s hardness and surface condition. Excessive friction can create heat, uneven facets, or permanent damage. I have seen attractive stones lose their crisp edges through impatient polishing. That mistake is easy to repeat.

Valuable, antique, porous, treated, or heavily scratched gemstones deserve a qualified gemologist’s inspection. Ask what treatment the stone has received and request a cautious test on an inconspicuous area. Results can vary. Even experienced polishers sometimes reassess their technique after the first pass. This guide explores safer tools, surface preparation, gemstone-specific methods, and warning signs that indicate when polishing should stop.
2026 Top Tips for Polishing Dull Gemstones?

Identify the Gemstone and Assess Its Surface Condition

Before polishing a dull gemstone, identify what you are holding. Color alone can mislead, especially under warm household lighting. Inspect it in daylight, then compare its transparency, luster, inclusions, and facet pattern. A ten-power loupe helps reveal scratches, chips, and cloudy patches. Keep notes. Hardness matters because an unsuitable abrasive can round edges or leave deeper marks. Use a gemological reference or consult a qualified gemologist when the stone is unknown.

Surface condition determines whether polishing is sensible. Rinse loose dirt with lukewarm water and mild soap, then pat the stone dry. Never rub grit across the surface. Under a bright, angled light, separate surface film from internal fractures. Fine scratches may respond to careful repolishing, but fractures, cavities, and coatings require caution. Some stones are porous, treated, or heat-sensitive. Moisture or pressure can worsen hidden damage. That distinction is easy to miss.

During my early work
I mistook a dull coating for damage and nearly chose the wrong polishing approach. Now I photograph each face before handling it. I check corners, drill holes, and areas near inclusions. Uneven wear often shows as softened facet junctions. Do not polish just to create shine. Preserve the stone’s original geometry. If identity remains uncertain, stop before testing hardness or applying abrasives. That pause may feel excessive. It is usually cheaper than repairing an avoidable loss.

Gather Safe Tools and Prepare a Clean Polishing Workspace

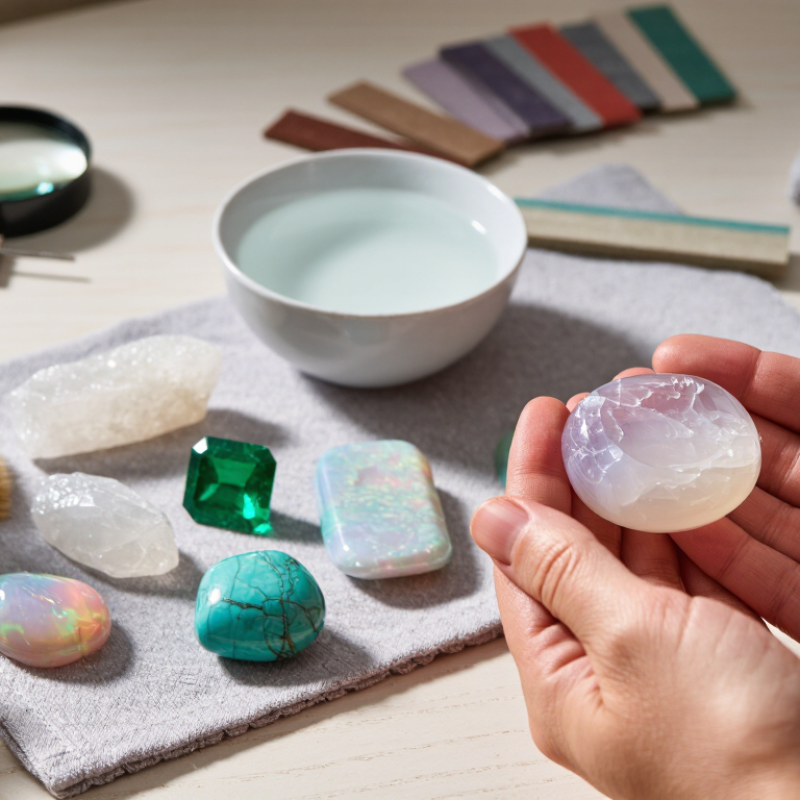
A clean workspace is the safest starting point for polishing dull gemstones. Clear the bench, remove loose grit, and place a white, non-slip mat underneath. Good lighting reveals scratches, pits, and hidden fractures. Use a loupe before polishing. Check the stone’s hardness, treatment history, and cleavage risk. Heat and sudden pressure can damage some gems permanently. Keep separate water containers for coarse and fine abrasives. One stray grain can create fresh scratches.

Tips: Wear safety glasses, hearing protection, and suitable respiratory protection. Use wet polishing methods whenever possible. OSHA’s Respirable Crystalline Silica Standard sets an eight-hour exposure limit of 50 micrograms per cubic meter, with an action level of 25 micrograms. Avoid compressed air. It can spread fine dust across the room. Do not wear loose sleeves or unsecured gloves near rotating equipment. Keep a first-aid kit within reach.

Choose tools that match the stone, not the other way around. A firm polishing lap, clean felt, calibrated speed control, and dedicated cloths improve consistency. Wipe the stone between stages. Inspect it under angled light after every few minutes. I still recheck my setup, because one forgotten abrasive particle can undo careful work. That small delay feels unnecessary, but it prevents avoidable mistakes. OSHA guidance and NIOSH occupational-safety publications both stress dust control, ventilation, and housekeeping in abrasive work areas. A clean bench protects the gemstone and the person polishing it.

Clean the Stone Before Removing Surface Dullness

2026 Top Tips for Polishing Dull Gemstones

Clean the stone before removing surface dullness. Dust and skin oils can form a gray film over the surface. Polishing too early may push grit across the gem and create fine scratches. Gemological Institute of America care guidance recommends lukewarm water, mild soap, and a soft brush for many durable gemstones. Keep the water around 30–40°C, not hot. Rinse thoroughly, then pat the stone with a lint-free cloth. Small details matter.

Inspect the gem under bright, diffused light. A ten-power loupe can reveal trapped dirt, abrasions, loose settings, or filled fractures. GIA reference data places quartz at Mohs 7 and corundum at Mohs 9, but hardness alone does not prove cleaning safety. Sudden temperature changes can stress some stones. Emeralds, opals, pearls, turquoise, and treated gems need extra caution. Avoid ultrasonic or steam cleaning unless a qualified gemologist confirms suitability. CIBJO’s Blue Books also emphasize accurate treatment disclosure, which affects care decisions.

I have seen “dull” stones become bright after cleaning alone. That result is easy to underestimate. If haze remains, do not use household powders or abrasive paste. They can damage softer materials or obscure surface treatments. Ask a qualified gemologist to identify the gemstone, treatment, and safest polishing method. DIY polishing sometimes works. Sometimes it removes more than dullness.

Polish the Gemstone Gradually with the Correct Abrasive

Polish the Gemstone Gradually with the Correct Abrasive

A dull gemstone rarely needs aggressive polishing at once. Clean it first, then inspect the surface under a bright, angled lamp. Dust can imitate scratches. I learned this after removing material unnecessarily from a cabochon’s shoulder.

Choose the abrasive according to the stone’s hardness and surface condition. The Gemological Institute of America lists corundum at Mohs 9 and diamond at Mohs 10, showing why diamond powder can cut many durable gemstones efficiently. However, harder is not always better. Begin with a fine abrasive when the scratches are shallow. Use light pressure and short, even passes. Keep the stone moving. Heat can build quickly on small contact areas.

The United States Geological Survey’s Mineral Commodity Summaries identifies diamond grit and powder as important materials for cutting and polishing applications. Its data supports using consistent abrasive grades rather than mixing uncertain particles. A practical sequence might move from 600 grit to 1,200 grit, then 3,000 grit, depending on the stone. Clean the work surface between stages. One coarse particle can create fresh lines across a nearly finished face.

Do not chase instant shine. Check the reflection after every stage. Some stones respond slowly, and that is normal. My own mistake was polishing longer instead of changing the abrasive. Patience often removes less material. That matters near edges, sharp facets, and natural inclusions. GIA care guidance also stresses that gemstones differ in durability, so pressure and polishing speed should remain conservative.

Inspect, Rinse, and Store the Finished Gemstone Properly

2026 Top Tips for Polishing Dull Gemstones

After polishing, inspect the gemstone under bright, indirect light. Turn it slowly and check for cloudy patches, fine scratches, loose edges, or polishing residue. A 10x loupe can reveal marks that normal lighting hides. Experienced gem workers often inspect the girdle and setting area carefully, where dust collects easily. Do not assume extra polishing will improve every stone. Some dullness comes from internal fractures or surface wear, not removable residue.

Rinse the finished gemstone with lukewarm water and a small amount of mild soap. Use a very soft brush around the back and edges, then rinse again. Avoid sudden temperature changes, harsh chemicals, and aggressive scrubbing. Stones with fractures, delicate surfaces, or natural porosity may need gentler handling. A common mistake is polishing too confidently, then discovering a softened edge later. Pause and reassess.

Tips: Pat the stone dry with a lint-free cloth, rather than rubbing it hard. Store each gemstone separately in a soft pouch or divided compartment. Keep finished stones away from grit, direct sunlight, and damp storage areas. Before closing the container, check that the gemstone is completely dry. This small step matters. If the surface still looks uneven, photograph it under the same light and review the result later. Fresh eyes often notice details missed during polishing.

FAQS

Why should I clean a gemstone before polishing it?

Dust and skin oils can create a gray film. Polishing over grit may cause fine scratches. Clean first.

What is a safe basic cleaning method?

Use lukewarm water, mild soap, and a soft brush. Keep the water around 30–40°C. Rinse well and pat dry with a lint-free cloth.

How can I inspect a dull gemstone?

Use bright, diffused light and a ten-power loupe. Check for dirt, abrasions, loose settings, and filled fractures. Small flaws matter.

Can every gemstone be cleaned with ultrasonic or steam equipment?

No. Emeralds, opals, pearls, turquoise, and treated stones need extra caution. Use special equipment only after professional confirmation.

Does gemstone hardness determine the safest polishing method?

No. Hardness helps, but it does not reveal treatments or hidden weaknesses. Sudden temperature changes can also stress some stones.

What abrasive sequence can help remove shallow scratches?

A gradual sequence may use 600, 1,200, and 3,000 grit. Choose the grade for the stone and its surface condition. Do not mix uncertain particles.

How should I polish the gemstone without removing too much material?

Use light pressure and short, even passes. Keep the stone moving to limit heat. Check the reflection after each stage.

What mistakes should I avoid during polishing?

Avoid household powders and abrasive paste. They may damage softer materials or hide surface treatments. I once polished longer instead of changing the abrasive; that was a poor choice.

When should I stop polishing and seek professional help?

Stop when haze remains after careful cleaning, or when the stone has inclusions, fractures, or a loose setting. A qualified gemologist can identify the material and treatment. Sometimes polishing removes more than dullness.

Conclusion

Polishing a dull gemstone begins with identifying its type and carefully assessing the surface. Different stones vary in hardness and sensitivity, so inspect for scratches, cracks, coatings, or loose inclusions before choosing a polishing method. Prepare a clean, well-lit workspace with soft cloths, water, protective eyewear, and suitable abrasives. Cleaning the stone first removes dust, oils, and residue that could cause additional scratches during polishing.

What is the best way to polish dull gemstones? The safest approach is to work gradually, using the least aggressive abrasive that matches the gemstone’s hardness and condition. Apply gentle, even pressure and check the surface frequently rather than trying to restore shine in one step. Once the stone looks clear and smooth, rinse away all abrasive particles, dry it with a soft cloth, and inspect it under good lighting. Store the finished gemstone separately in a clean, padded container to protect its renewed surface from scratches and everyday wear.

Sienna

Sienna

Sienna is a skilled marketing professional with a deep expertise in our company’s core products and services. With a passion for innovation and detail, she plays a pivotal role in crafting insightful blog posts that not only highlight the unique features of our offerings but also provide valuable......